The Best Fluffy Pancakes recipe you will fall in love with. Full of tips and tricks to help you make the best pancakes.
Introduction
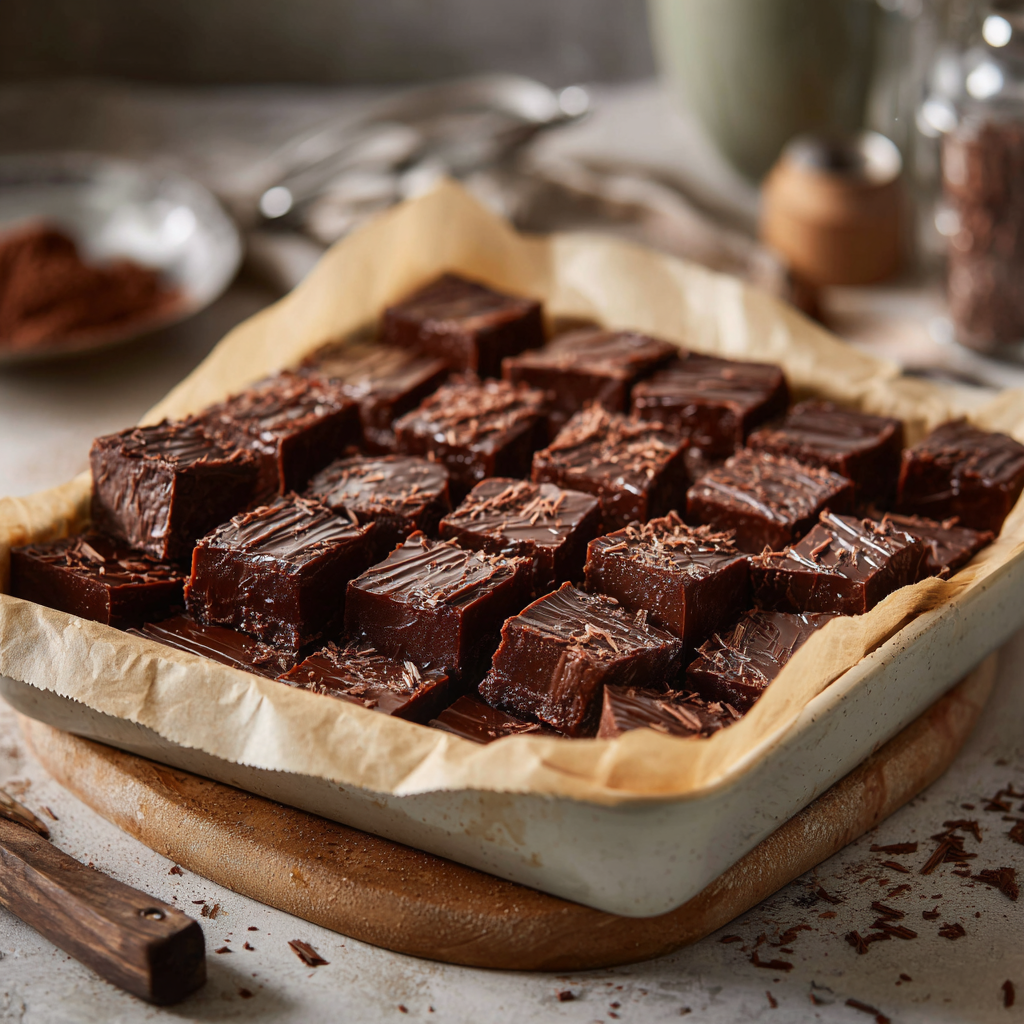
There’s something timeless about a piece of homemade chocolate fudge. It feels nostalgic, indulgent, and deeply comforting all at once. These Ultimate Creamy Chocolate Fudge Bites are everything a chocolate lover dreams about — rich cocoa flavor, velvety texture, and that delicate melt-in-your-mouth finish that makes every bite unforgettable.
Unlike grainy or overly sweet fudge recipes, this version focuses on pure chocolate flavor balanced by a luxuriously smooth consistency. The secret lies in combining high-quality chocolate with sweetened condensed milk, creating a foolproof recipe that comes together with minimal effort. Whether you’re preparing a holiday dessert tray, gifting homemade sweets, or simply craving a decadent late-night treat, these little squares deliver big satisfaction.
Best of all, these chocolate fudge bites require no baking, making them perfect for beginners and experienced home bakers alike.
Why You’ll Love This Recipe
- Incredibly smooth and creamy texture
- Deep, intense chocolate flavor
- Only a few simple ingredients
- No baking required
- Perfect for holidays and gifting
- Easy enough for beginner cooks
- Stores beautifully for days
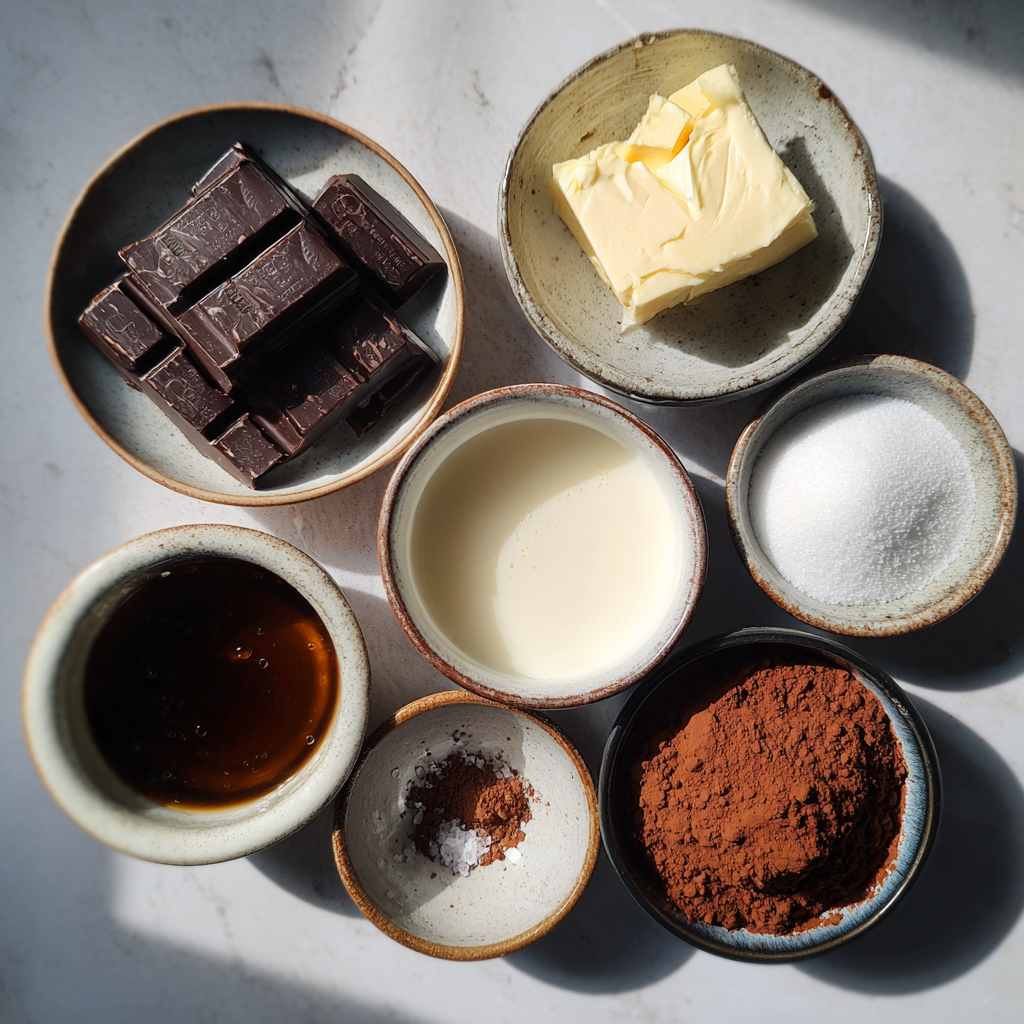
Ingredients
- 3 cups semi-sweet chocolate chips
- 1 can sweetened condensed milk
- 3 tablespoons unsalted butter
- 1 teaspoon pure vanilla extract
- 2 tablespoons unsweetened cocoa powder
- 1 pinch fine sea salt
- ¼ cup mini chocolate chips for topping (optional)
- flaky sea salt for garnish (optional)
Instructions
- Prepare the pan
Line an 8×8-inch square pan with parchment paper, leaving extra overhang on the sides so the fudge can be lifted out easily later. - Combine ingredients
In a medium saucepan over low heat, combine the chocolate chips, sweetened condensed milk, and butter. - Melt gently
Stir continuously until the chocolate fully melts and the mixture becomes glossy and smooth. - Add flavorings
Remove from heat and stir in the vanilla extract, cocoa powder, and pinch of salt until fully incorporated. - Transfer to pan
Pour the fudge mixture into the prepared pan and spread evenly using a spatula. - Add topping
Sprinkle mini chocolate chips or flaky sea salt over the top if desired. - Chill
Refrigerate for at least 2 hours or until fully firm. - Slice and serve
Lift the fudge from the pan and cut into small bite-sized squares with a sharp knife.
Pro Tips
Use premium chocolate
The better your chocolate, the richer your fudge tastes. High-quality chocolate makes a noticeable difference.
Warm your knife
Dip your knife in hot water and wipe dry before slicing for perfectly clean edges.
Don’t overheat
Low heat is essential. High heat can scorch chocolate and ruin the texture.
Chill fully
Patience matters — cutting too soon can make the fudge messy.
Variations
Salted Caramel Fudge
Swirl caramel sauce into the mixture before chilling and top with sea salt.
Espresso Chocolate Fudge
Add 1 teaspoon espresso powder to deepen the chocolate flavor.
Nutty Fudge
Fold chopped walnuts, pecans, or hazelnuts into the mixture.
Serving Suggestions
These creamy chocolate fudge bites pair wonderfully with:
- Fresh strawberries
- Hot coffee
- Vanilla ice cream
- Holiday cookie platters
- Dessert grazing boards
Serve them in mini paper liners for a polished homemade candy-shop presentation.
Storage & Reheating
Refrigerator
Store in an airtight container for up to 2 weeks.
Freezer
Freeze for up to 3 months in a sealed container with parchment between layers.
Room Temperature
Can sit out for several hours when serving, but stays best chilled.
Since this is a no-bake dessert, reheating is not recommended.
Common Mistakes to Avoid
Overheating the chocolate
Too much heat can cause chocolate to seize.
Skipping parchment paper
Without parchment, removing the fudge becomes difficult.
Using poor-quality chocolate
Cheap chocolate can make the flavor flat and overly sweet.
Cutting before fully chilled
Warm fudge won’t hold neat square shapes.

Cultural Context or Fun Facts
Fudge originated in the United States during the late 19th century and quickly became a beloved homemade confection. Traditional fudge was made by carefully boiling sugar to a precise temperature before beating it into a creamy consistency. Modern shortcuts like sweetened condensed milk make the process much easier while preserving the rich texture people love.
Chocolate fudge became especially popular as a holiday gift because it stores well and feels luxurious without requiring complicated baking skills.
FAQs
Can I use milk chocolate instead?
Yes, but the result will be sweeter and slightly softer.
Why is my fudge too soft?
It may need more chilling time or the chocolate ratio may be too low.
Can I make this dairy-free?
Yes, use dairy-free chocolate and sweetened condensed coconut milk.
How small should I cut the bites?
Small 1-inch squares work best because the fudge is very rich.
Can I add nuts?
Absolutely. Chopped toasted nuts add excellent texture.
Ultimate Creamy Chocolate Fudge Bites
Silky smooth chocolate fudge bites with rich flavor and a melt-in-your-mouth texture that makes them perfect for gifting or snacking.
Ingredients
Equipment
Method
- Line an 8×8-inch baking dish with parchment paper.
- Melt chocolate chips, condensed milk, and butter over low heat until smooth.
- Stir in vanilla, cocoa powder, and salt.
- Spread the mixture evenly into the prepared dish.
- Add optional toppings and chill for 2 hours.
- Slice into bite-sized squares and serve.
Notes
Use high-quality chocolate for the best flavor and smoothest texture.