The Best Fluffy Pancakes recipe you will fall in love with. Full of tips and tricks to help you make the best pancakes.
Introduction
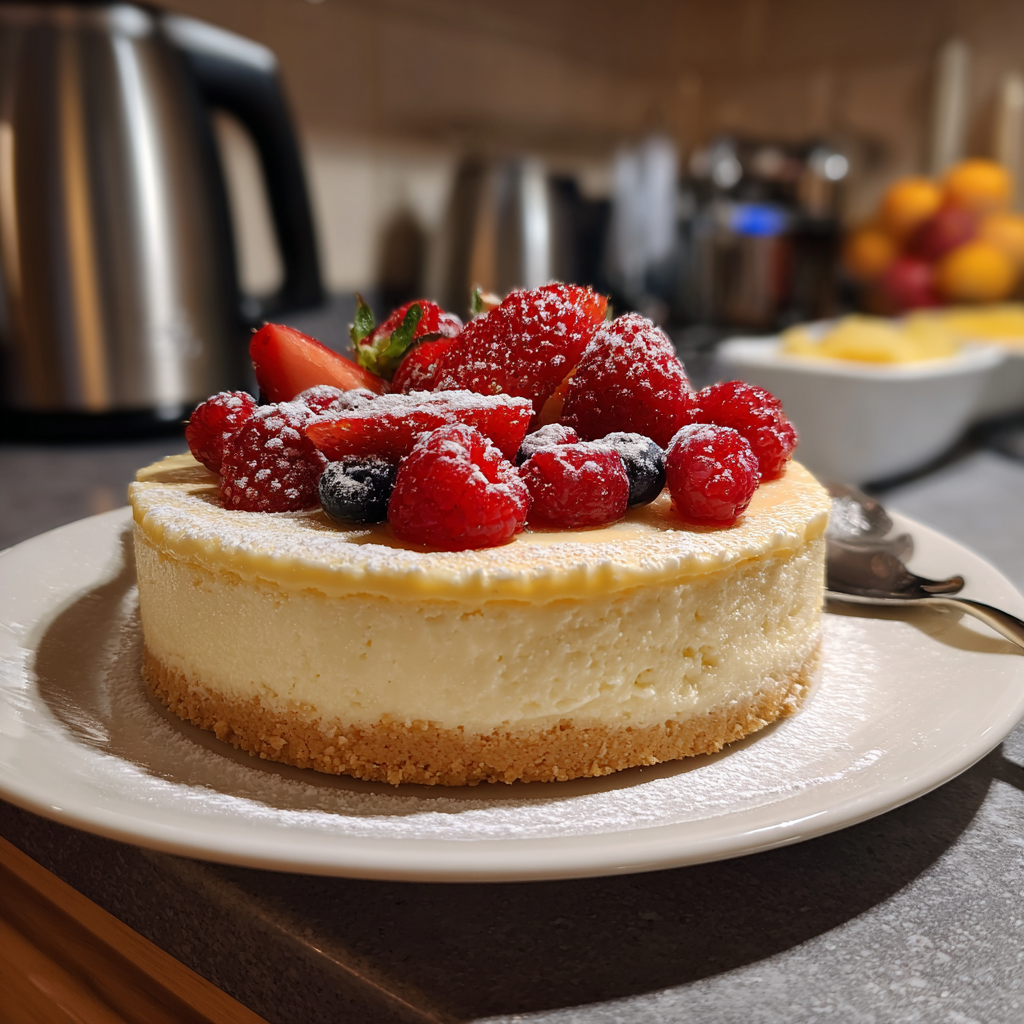
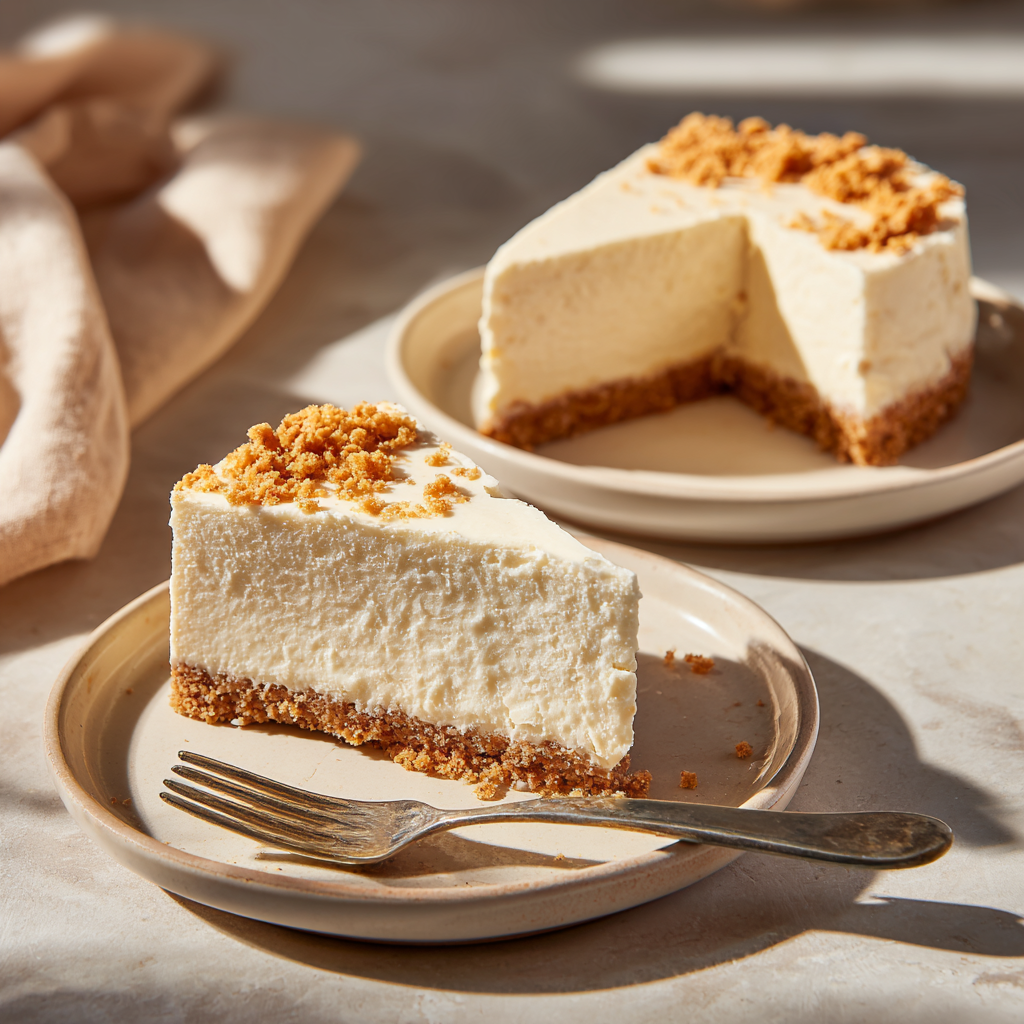
There’s something almost magical about a dessert that requires no oven, no complicated techniques, and yet delivers a result that tastes like it came straight from a high-end bakery. This silky no-bake cheesecake dream is exactly that kind of dessert—a quiet showstopper that turns simple ingredients into something indulgent, creamy, and unforgettable.
I first fell in love with no-bake cheesecakes on a hot summer afternoon when turning on the oven felt like a crime. I needed something cool, refreshing, and easy—and what I ended up with was a dessert so smooth and rich that it instantly became a staple in my kitchen. The beauty of this recipe lies in its balance: a buttery, slightly crunchy biscuit base paired with a luscious, cloud-like cream cheese filling that melts on your tongue.
Unlike baked cheesecakes, which can sometimes feel dense or intimidating, this version is forgiving and beginner-friendly. There’s no worrying about cracks, water baths, or overbaking. Instead, you get a consistently creamy texture every time, with minimal effort.
Whether you’re making it for a family gathering, a casual dinner, or simply to treat yourself after a long day, this easy cheesecake without baking delivers pure comfort in every bite.
Why You’ll Love This Recipe
- No oven required — perfect for warm days or small kitchens
- Ultra-creamy texture that feels light yet indulgent
- Simple ingredients you probably already have
- Beginner-friendly with foolproof steps
- Customizable with endless topping and flavor options
- Perfect make-ahead dessert for stress-free hosting
- Balanced sweetness with a buttery biscuit crunch
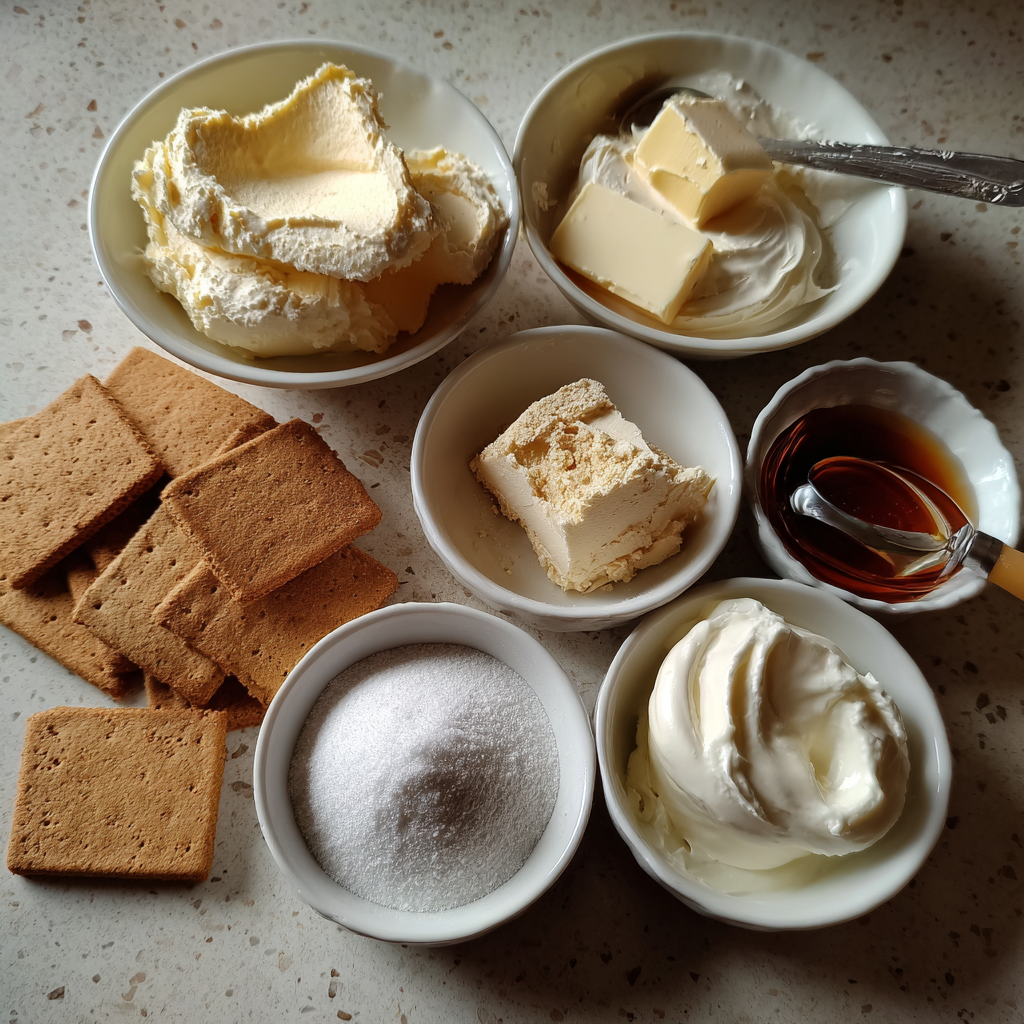
Ingredients
For the Biscuit Base
- 200g digestive biscuits (or graham crackers) – crushed finely
- 100g unsalted butter – melted
- 2 tablespoons sugar (optional, depending on biscuit sweetness)
For the Creamy Filling
- 400g cream cheese – softened at room temperature
- 200ml heavy cream – cold
- 100g powdered sugar – sifted
- 1 teaspoon vanilla extract – for flavor depth
- 1 tablespoon lemon juice – adds subtle brightness
Optional Toppings
- Fresh berries (strawberries, blueberries, raspberries)
- Fruit compote or jam
- Chocolate shavings
- Caramel drizzle
Instructions
1. Prepare the Biscuit Base
Crush the digestive biscuits into fine crumbs using a food processor or by placing them in a sealed bag and rolling over them with a rolling pin. You want a sand-like texture with no large chunks.
Transfer the crumbs to a mixing bowl, then pour in the melted butter. Mix thoroughly until every crumb is coated and the mixture resembles wet sand.
Press the mixture firmly into the bottom of a springform pan, using the back of a spoon or a flat glass to create an even layer. Make sure to press it tightly so it holds together later.
Place the base in the refrigerator to chill for at least 20–30 minutes while you prepare the filling.
2. Make the Creamy Cheesecake Filling
In a large bowl, beat the softened cream cheese until smooth and lump-free. This step is crucial—take your time to ensure a silky texture.
Add the powdered sugar and mix until fully incorporated. Then add the vanilla extract and lemon juice, blending gently.
In a separate bowl, whip the cold heavy cream until soft peaks form. Be careful not to overwhip—you’re looking for a light, airy consistency.
Fold the whipped cream into the cream cheese mixture gradually. Use a spatula and gentle motions to keep the mixture light and fluffy.
3. Assemble the Cheesecake
Remove the chilled base from the fridge. Spoon the filling over the biscuit crust and spread it evenly, smoothing the top with a spatula.
Tap the pan lightly on the counter to remove any air bubbles.
Cover and refrigerate for at least 6 hours, preferably overnight, until fully set.
4. Add Toppings and Serve
Once the cheesecake is firm, carefully remove it from the springform pan.
Top with fresh berries, a drizzle of caramel, or your favorite topping. Slice with a warm knife for clean edges.
Serve chilled and enjoy every creamy bite.
Pro Tips
- Always use room temperature cream cheese to avoid lumps
- Chill the mixing bowl before whipping cream for better volume
- Press the biscuit base firmly—this prevents crumbling when slicing
- Don’t rush the chilling time; it’s essential for structure
- Use a hot knife (run under warm water) for clean, bakery-style slices
Variations
1. Chocolate Lover’s Cheesecake
Add melted dark chocolate to the filling and top with chocolate ganache for a rich, indulgent twist.
2. Tropical Mango Cheesecake
Blend fresh mango puree into the filling and top with mango slices for a refreshing summer vibe.
3. Lemon Zest Cheesecake
Increase the lemon juice slightly and add lemon zest for a bright, tangy flavor profile.
Serving Suggestions
This creamy cheesecake dessert shines on its own, but you can elevate it even further with thoughtful presentation. Serve slices on chilled plates with a few fresh berries scattered around. A light dusting of powdered sugar adds a delicate finish.
Pair it with a cup of coffee or tea for a cozy dessert experience, or serve alongside a fruit salad for a refreshing contrast. For special occasions, drizzle each slice with berry coulis or chocolate sauce just before serving.
Storage & Reheating
Store the cheesecake in the refrigerator, covered, for up to 4 days. Keep it in an airtight container or wrap the pan tightly with plastic wrap to prevent it from absorbing other flavors.
This dessert is not meant to be reheated. Instead, enjoy it cold straight from the fridge.
For longer storage, you can freeze it for up to 2 months. Wrap slices individually and thaw overnight in the refrigerator before serving.
Common Mistakes to Avoid
- Using cold cream cheese: This leads to a lumpy filling
- Overwhipping the cream: Can make the texture dense instead of light
- Skipping chill time: The cheesecake won’t set properly
- Loose biscuit base: Not pressing it firmly enough causes crumbling
- Overmixing after adding cream: Can deflate the airy texture
Cultural Context or Fun Facts
Cheesecake has a surprisingly long history, dating back to ancient Greece where it was served to athletes during the first Olympic Games. Over time, it evolved across cultures—from baked New York-style cheesecakes to lighter European versions.
The no-bake cheesecake gained popularity in the 20th century as refrigeration became more common. It offered a simpler, quicker alternative to traditional baked versions while still delivering that iconic creamy texture we all love today.
FAQs
1. Can I make this cheesecake without a springform pan?
Yes! You can use a regular cake pan lined with parchment paper, but removing the cheesecake will be slightly more challenging.
2. How do I know when the cheesecake is set?
It should feel firm to the touch and hold its shape when sliced. If it’s still wobbly, give it more time in the fridge.
3. Can I use low-fat cream cheese?
You can, but the texture may be less rich and creamy. Full-fat cream cheese gives the best results.
4. What biscuits work best for the base?
Digestive biscuits or graham crackers are ideal, but you can experiment with chocolate cookies or other crunchy biscuits.
5. Can I make it ahead of time?
Absolutely. This is a perfect make-ahead dessert and actually tastes better after chilling overnight.
Silky No-Bake Cheesecake Dream
A rich and creamy no-bake cheesecake with a buttery biscuit base, perfect for an easy and elegant dessert.
Ingredients
Equipment
Method
- Crush biscuits and mix with melted butter, then press into a pan and chill.
- Beat cream cheese, sugar, and vanilla, then fold in whipped cream.
- Spread filling over base and refrigerate until set.
Notes
Chill overnight for best texture and flavor.